CodeIgniter3
25. [CodeIgniter3] MySQL에 한번에 여러 데이터 삽입하기
drizzle0925
2022. 1. 7. 16:51
728x90

CodeIgniter 프레임워크를 사용하여 MySQL 데이터베이스에서 단일 및 다중 레코드를 저장하는 방법에 대해 설명합니다. 웹 사이트에 하나의 데이터를 입력하려는 경우 쿼리 입력 방법 삽입 방법을 사용할 수 있고 데이터베이스에 여러 레코드를 추가하려는 경우 insert_batch 쿼리 방법을 사용할 수 있습니다.
다음은 insert_batch Query 메서드를 사용하는 예제입니다.
<?php
// 배열을 이용하기
$myData = array(
    array(
        'name' => 'Your Name',
        'email' => 'Your Email',
        'course' => 'Your Course'
    ),
    array(
        'name' => 'Your Name',
        'email' => 'Your Email',
        'course' => 'Your Course'
    )
);
$this->db->insert_batch('mytable', $myData);

// OR

// Form 이용하기
$post = $this->input->post();
for($i=0; $i < count($post['name']); $i++)
{
    $this->db->insert('my_table', array(
        'name' => $post['name'][$i],
        'email' => $post['email'][$i],
        'course' => $post['course'][$i]
    ));
}
?>
뷰 템플릿
<div class="box-body table-responsive">
	<table id="exampled1" class="table table-bordered table-striped">
		<thead>
			<tr>
				<th class="col-md-2 col-xs-5">Name</th>
				<th class="col-md-2 col-xs-5">Depmt</th>
				<th class="col-md-2 col-xs-5">course</th>
			</tr>
		</thead>
		<form method="post">
			<?php
			for($i=0; $i<3; $i++)
			{
			?>
			<tr>
				<td><input type="text" name="Name[]" /></td>
				<td><input type="text" name="Depmt[]" /></td>
				<td><input type="text" name="course[]" /></td>
			</tr>
			<?php
			}
			?>
			<tr>
				<td colspan="3" align="center"><input type="submit" class="btn btn-primary" value="save"></td>
			</tr>
		</form>
	</table>
</div>
예제를 만들어 보겠습니다.
View
application/views/center_emp_details.php 파일을 만들고 아래 코드를 입력합니다.
<!DOCTYPE html>
<html lang="ko">
<head>
    <meta charset="UTF-8">
    <meta http-equiv="X-UA-Compatible" content="IE=edge">
    <meta name="viewport" content="width=device-width, initial-scale=1.0">
    <title>Center Emp Details</title>
    <link rel="stylesheet" href="https://maxcdn.bootstrapcdn.com/bootstrap/4.3.1/css/bootstrap.min.css">
</head>
<body>
    <div class="box-body table-responsive" >
    <table id="example1" class="table table-bordered table-striped">
    <thead>
        <tr>
            <th class="col-md-2 col-xs-5">Name</th>
            <th class="col-md-2 col-xs-3">Depmt</th>
            <th class="col-md-2 col-xs-3">Course</th>
        </tr>
    </thead>
        <form method="post">
            <?php for ($i=0; $i < 3 ; $i++)
            {?>
            <tr>
                <td><input type="text" name="Name[]"></td>
                <td><input type="text" name="Depmt[]"></td>
                <td><input type="text" name="course[]"></td>
            </tr>

            <?php  } ?>

            <tr><td colspan="3" align="center">
            <input type="submit" class="btn btn-primary" value="save"></td></tr>
        </form>
    </table>
    </div>
</body>
</html>
Controller
application/controllers/Dashboard.php 파일을 만들고 아래 코드를 입력합니다.
<?php
defined('BASEPATH') OR exit('No direct script access allowed');
class Dashboard extends CI_Controller
{
    function __construct()
    {
        parent::__construct();
    }

    public function center_details()
    {
        $this->form_validation->set_rules('Name[]', 'Name', 'required');
        $this->form_validation->set_rules('Depmt[]', 'Department', 'required');
        $this->form_validation->set_rules('course[]', 'Course', 'required');

        if($this->form_validation->run() == FALSE)
        {
            $this->load->view('admin/center_emp_details');
        }
        else
        {
            $post = $this->input->post();
            for($i=0; $i<count($post['Name']); $i++)
            {
                $data = array(
                    'name' => $post['Name'][$i],
                    'department' => $post['Depmt'][$i],
                    'course' => $post['course'][$i]
                );
                // 실행결과 : INSERT INTO salary(name,department,course) VALUES('$post['Name'][$i]','$post['Dempt'][$i]',''course' => $post['course'][$i]')
                $this->db->insert('salary', $data);
            }
        }
    }
}
?>
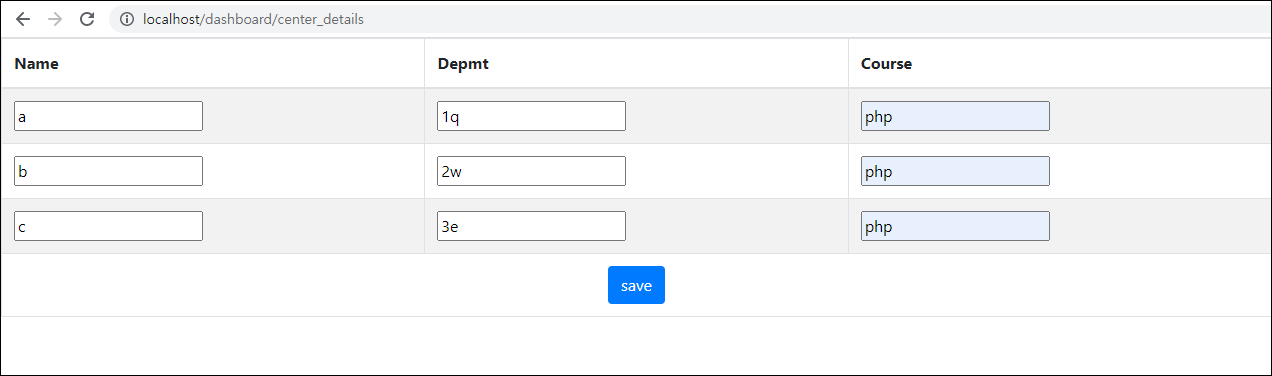
아래 URL로 이동합니다.
localhost/dashboard/center_details/
데이터를 입력하고 save버튼을 클릭합니다.
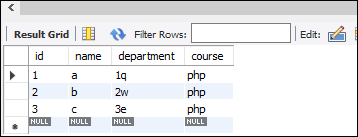
데이터베이스를 확인해봅니다.
데이터가 잘 등록되어 있습니다.
Github : https://github.com/jun0925/study/commit/82c39c2047bf374fbceadb4d46fc3a0befef6031
728x90