CodeIgniter3
11. [CodeIgniter3] 파일 및 이미지를 업로드하는 방법(Upload file & image)
drizzle0925
2021. 12. 31. 09:50
728x90
코드 이그나이터에서 이미지를 업로드하는 방법에는 3단계가 있습니다.
1단계 : 폴더 생성
먼저 파일을 업로드할 폴더를 생성해야 합니다.
이 폴더는 업로드 후 이미지가 저장될 폴더입니다.
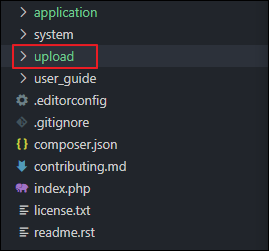
CodeIgniter가 설치된 폴더로 이동하여 upload 폴더를 생성합니다.
application과 동일한 위치에 upload 폴더를 생성하면 됩니다.
Controller
2단계 : 컨트롤러 생성
이 컨트롤러에서는 먼저 2개의 라이브러리와 헬퍼를 호출해야 합니다.
// url과 form 헬퍼
$this->load->helper('url','form');
// 폼 유효성 검사 라이브러리
$this->load->library('form_validation');
// 파일 업로드 라이브러러
$this->load->library('upload');
application/controllers/ImageUpload.php 파일을 생성하고 아래 코드를 입력합니다.
<?php
class ImageUpload extends CI_Controller
{
    public function __construct()
    {
        // CodeIgniter의 기본 생성자 호출
        parent::__construct();
        // url과 form에 대한 helper를 호출합니다.
        $this->load->helper('url', 'form');
        // form 유효성검사에 사용할 라이브러리를 호출합니다.
        $this->load->library('form_validation');
    }

    public function index()
    {
        // imageupload_form view 파일을 호출합니다.
        $this->load->view('imageupload_form');
    }

    // upload 처리 메서드
    public function upload()
    {
        // 업로드에 필요한 설정을 지정합니다.
        // 업로드할 파일 위치
        $config['upload_path'] = './upload/';
        // 업로드에 허용할 이미지 확장자
        $config['allowed_types'] = 'gif|jpg|png';
        // 업로드 용량 제한
        $config['max_size'] = 2000;
        // 업로드 가로폭 제한
        $config['max_width'] = 1500;
        // 업로드 세로폭 제한
        $config['max_height'] = 1500;

        // 업로드에 필요한 설정을 전달하여 업로드 라이브러리를 호출합니다.
        $this->load->library('upload', $config);

        // file 타입의 input name값을 가져옵니다. name="profile_pic"에 값이 없는 경우 error 메시지를 출력합니다.
        if(!$this->upload->do_upload('profile_pic'))
        {
            $error = array('error' => $this->upload->display_errors());

            // error가 발생한 경우 erorr 내용을 imageupload_form view 파일에 전달하여 호출합니다.
            $this->load->view('imageupload_form', $error);
        }
        else
        {
            // 파일정보를 data 변수에 대입합니다.
            $data = array('image_metadata' => $this->upload->data());

            $this->load->view('imageupload_success', $data);
        }
    }
}
?>
View
3단계 : 이미지를 업로드할 View파일을 생성합니다.
application/views/imageupload_form.php 파일을 만들고 아래 코드를 입력합니다.
<!DOCTYPE html>
<html lang="ko">
<head>
    <meta charset="UTF-8">
    <meta http-equiv="X-UA-Compatible" content="IE=edge">
    <meta name="viewport" content="width=device-width, initial-scale=1.0">
    <title>Upload Image in Codeigniter</title>
</head>
<body>
    <?php echo @$error; ?>
    <?php echo form_open_multipart('ImageUpload/upload'); ?>
    <?php echo '<input type="file" name="profile_pic" size="20" />'; ?>
    <?php echo '<input type="submit" name="submit" value="upload" />'; ?>
    <?php echo '</form>'; ?>
</body>
</html>
이미지를 성공적으로 업로드했을 때 표시할 View 파일을 생성합니다.
application/views/imageupload_success.php 파일을 만들고 아래 코드를 입력합니다.
<!DOCTYPE html>
<html lang="ko">
<head>
    <meta charset="UTF-8">
    <meta http-equiv="X-UA-Compatible" content="IE=edge">
    <meta name="viewport" content="width=device-width, initial-scale=1.0">
    <title>Image Uploaded Success</title>
</head>
<body>
    <h1>Congreates image uploaded successfully</h1>
</body>
</html>
아래 URL로 이동하면 다음과 같은 화면이 나옵니다.
http://localhost/index.php/ImageUpload/
파일 선택을 누르고 파일을 선택합니다.

upload 버튼을 클릭합니다.
파일이 정상적으로 업로드되면 아래 화면이 표시됩니다.

아래 URL로 이동하여 파일이 업로드되었는지 확인합니다.
http://localhost/upload/firebase.png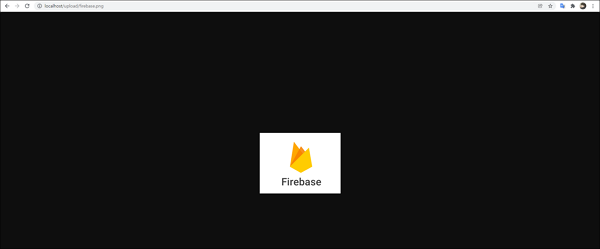

Github : https://github.com/jun0925/study/commit/1b3f97afe298f458448fee946b6230d9073186cf
728x90